


When it comes to car maintenance, one of the essential skills every DIY enthusiast should master is bleeding the brakes. This process is crucial for ensuring your braking system functions efficiently, as air bubbles can accumulate in the brake lines and lead to reduced brake performance. By eliminating air, you enhance pedal feel and improve overall vehicle safety.
This guide will provide you with a comprehensive, step-by-step approach to bleeding your brakes at home. Whether you’re a seasoned mechanic or just starting your journey in DIY auto repair, understanding the fundamentals of this procedure will save you time and money while ensuring your vehicle operates at its best.
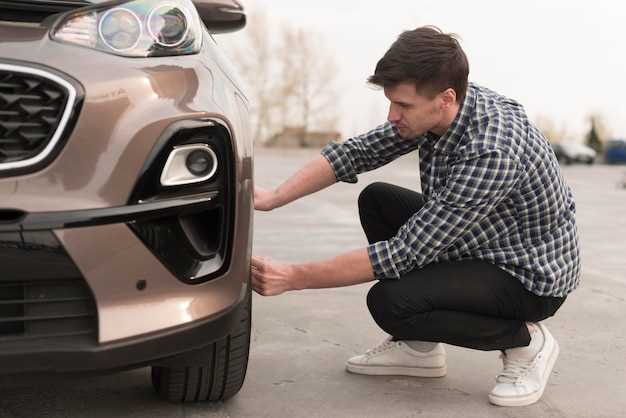
Before you dive into the process, it’s important to gather the necessary tools and materials. Having everything ready will streamline your workflow and ensure you complete the task efficiently. With the right preparation and guidance, you’ll be well on your way to mastering this vital maintenance technique.
Preparing Your Tools and Equipment for Brake Bleeding
Before you embark on your DIY brake bleeding project, it’s essential to gather all the necessary tools and equipment. This preparation not only streamlines the process but also ensures safety and efficiency. Here’s a list of what you’ll need.
First, invest in a quality brake bleeder kit. These kits typically include a vacuum pump or a pressure bleeder, which can help remove air from the brake lines effectively. Choose one that matches your vehicle’s requirements to ensure compatibility.
You’ll also need a wrench or pliers to loosen the bleeder screws on your brake calipers. Make sure the tools fit snugly to prevent stripping the screws. Typically, a brake line wrench is ideal, as it offers better grip.
A clear plastic hose is essential for directing the brake fluid into a container while bleeding the brakes. Ensure the hose fits securely over the bleeder valve to avoid leaks.Choosing a transparent material allows you to easily observe the progress and check for any air bubbles in the fluid.
Don’t forget a clean container to catch the old brake fluid. It’s crucial to use a container that won’t react with the fluid to avoid any hazardous reactions. Keep an eye on your fluid levels throughout the process as well.
Safety gear is a must; wear gloves and goggles to protect yourself from brake fluid, which can be corrosive. Make sure you are working in a well-ventilated area to avoid inhaling any fumes.
Lastly, have a supply of new brake fluid on hand. Check your vehicle’s manual for the recommended type, as using the wrong fluid can lead to brake system failure.
By preparing these tools and equipment ahead of time, you’ll not only make your DIY brake bleeding task smoother but also ensure that your brakes perform optimally after the process.
Step-by-Step Process for Air Removal from Brake Lines
To effectively bleed your brakes and remove air from the brake lines, follow this detailed step-by-step process. Before starting, ensure you have the necessary tools: a brake bleeder kit, a wrench, and fresh brake fluid.
1. Prepare the Vehicle: Park your vehicle on a level surface and engage the parking brake. Place wheel chocks behind the wheels to prevent rolling.
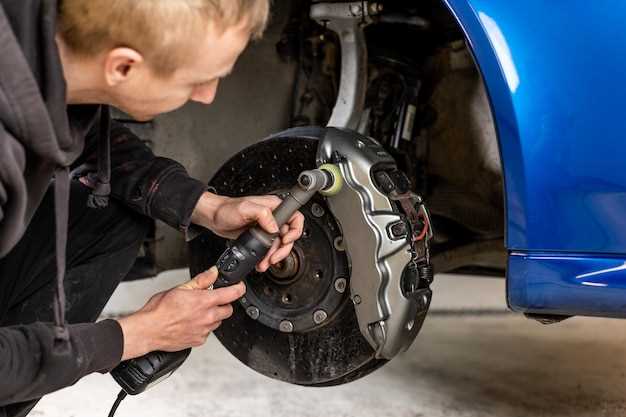
2. Locate the Brake Bleeder Valve: The brake bleeder valve is typically located on the brake caliper or wheel cylinder. Refer to your vehicle’s manual for the exact position.
3. Access the Brake Fluid Reservoir: Open the hood and locate the brake fluid reservoir. Ensure it has enough fluid to prevent air from entering during the bleeding process. Top it off if necessary.
4. Begin Bleeding at the Farthest Wheel: Start with the wheel that is furthest from the brake master cylinder, usually the rear passenger side. Attach the brake bleeder kit to the bleeder valve.
5. Open the Bleeder Valve: Using the correct size wrench, carefully turn the bleeder valve counterclockwise to open it. Make sure you have a container ready to catch the old brake fluid.
6. Pump the Brake Pedal: Instruct an assistant to pump the brake pedal several times and then hold it down. This action creates pressure in the system.
7. Close the Bleeder Valve: While your assistant holds the pedal down, close the bleeder valve by turning it clockwise. This prevents air from being sucked back into the system.
8. Repeat the Process: Repeat steps 5 to 7 until you see a steady stream of clear brake fluid without bubbles in the hose connected to the bleeder valve. This indicates that all air has been removed.
9. Move to the Next Wheel: Proceed to the next closest wheel to the brake master cylinder (typically rear driver side, then front passenger side, and finally front driver side) and repeat the bleeding process.
10. Check Fluid Levels: After bleeding all wheels, check the fluid level in the reservoir again. Top off if necessary and securely close the reservoir cap.
11. Test the Brake Pedal: With the engine running, press the brake pedal. It should feel firm and responsive. If it feels spongy, further bleeding may be required.
12. Clean Up: Dispose of the old brake fluid properly, as it is toxic. Clean any spills immediately, as brake fluid can damage paint and other surfaces.
By following this DIY bleeding process, you ensure that your brakes operate effectively and safely, contributing to your vehicle’s overall performance.
Tips for Testing and Ensuring Proper Brake Functionality
After bleeding your brakes, it is essential to test their functionality to ensure optimal performance and safety. Start by conducting a visual inspection of the brake components. Check for any signs of leaks in the brake lines and around the calipers. Any signs of fluid leakage can indicate an underlying issue that needs immediate attention.
Next, perform a pedal feel test. With the engine off, press the brake pedal firmly. The pedal should feel resistant and not sink to the floor. If it does, this may suggest air is still present in the brake lines, and you may need to repeat the bleeding process.
Once the visual inspection and pedal feel test are satisfactory, take your vehicle for a cautious test drive in a safe area. During the drive, pay attention to how the brakes respond. They should engage smoothly without any grinding noises or unusual vibrations. If you notice any odd behaviors, such as the vehicle pulling to one side, it may indicate uneven brake force, necessitating further adjustments or inspections.
Another essential aspect to check is the brake warning light on your dashboard. If it remains illuminated after bleeding and testing, consult your vehicle’s manual or a professional mechanic. Additionally, test your brakes at various speeds to ensure they react appropriately and provide adequate stopping power.
Finally, after a successful test drive, recheck the brake fluid level and inspect the brake components again for any signs of leaks. Maintaining proper brake functionality is crucial for safe driving, and consistent testing will help ensure that your brakes perform reliably over time.

