


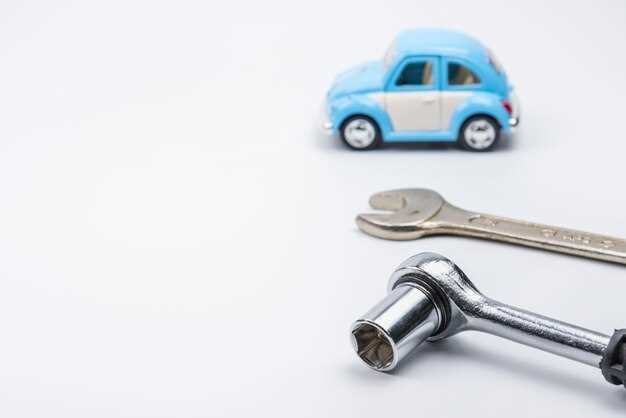
Maintaining your vehicle is essential for ensuring its longevity and performance. Regular maintenance can help prevent costly repairs, enhance safety, and improve fuel efficiency. For those new to car care, the thought of tackling maintenance tasks may seem daunting. However, with some basic knowledge and a few handy tips, you can become proficient in keeping your car in optimal condition.
This guide will walk you through key maintenance practices and tricks that every car owner should know. From checking fluid levels and changing oil to rotating tires and replacing air filters, we will cover everything you need to get started on your DIY journey. Not only will you save money on professional services, but you’ll also gain a deeper understanding of your vehicle.
With simple tools and a bit of time, you can take your car into your own hands. Let’s dive into the essential maintenance tips that will empower you to handle your car’s needs confidently. Whether you are looking to perform routine checks or tackle minor repairs, this guide will equip you with the knowledge necessary to keep your automobile in top shape.
How to Check and Change Your Engine Oil Like a Pro
Regular maintenance of your vehicle includes checking and changing your engine oil. This essential task ensures the longevity and performance of your engine. Here’s how to do it like a pro.
Step 1: Gather Your Tools
Before you start, ensure you have all the necessary tools at hand. You will need:
- New engine oil (consult your owner’s manual for the correct type and quantity)
- Oil filter
- Wrench or socket set
- Oil catch pan
- Funnel
- Rags or paper towels
Step 2: Check the Oil Level
Start your engine and let it run for a few minutes. This helps the oil warm up, making it easier to check. Turn off the engine, wait a minute, and then locate the dipstick. Remove it, wipe it clean, and insert it back into the tube. Remove it again to check the oil level. The oil should be between the minimum and maximum marks on the dipstick.
Step 3: Prepare to Change the Oil
Parks the car on a level surface and ensure the engine is cool. Place the oil catch pan under the oil pan, and remove the oil drain plug using your wrench. Allow the old oil to completely drain into the pan.
Step 4: Replace the Oil Filter
While the oil is draining, locate the oil filter. Use an oil filter wrench to remove it. Apply a bit of new oil to the rubber seal on the new filter before installing it. This ensures a proper seal and makes it easier to remove during the next oil change.
Step 5: Add New Oil
Once the old oil has drained, replace the drain plug and tighten it securely. Use a funnel to pour the new oil into the engine through the oil filler cap. Again, refer to your owner’s manual for the correct quantity to add.
Step 6: Check for Leaks
After you’ve added the new oil, start your engine and let it run for a minute. Check around the oil filter and the drain plug for any leaks. If everything is dry, you’ve done a great job.
Step 7: Dispose of Old Oil Properly
It’s important to dispose of your old oil and filter responsibly. Take them to a recycling center or an auto shop that accepts used oil.
By following these steps, you can efficiently check and change your engine oil, keeping your vehicle in excellent condition and enhancing its performance.
Simple Steps to Maintain Your Tire Health and Extend Lifespan

Maintaining your tires is essential for safe driving and can significantly extend their lifespan. Here are some do-it-yourself steps to ensure your tires stay in optimal condition.
1. Regularly Inspect Tire Pressure
Check your tire pressure at least once a month. Use a reliable gauge to measure the pressure when tires are cold. Keep them inflated to the manufacturer’s recommended PSI (pounds per square inch), which can be found in the owner’s manual or on the driver’s side door jamb. Proper inflation improves fuel efficiency and prevents uneven wear.
2. Rotate Your Tires
Rotate your tires every 5,000 to 7,500 miles to promote even wear. The pattern of rotation may vary depending on whether your car has front-wheel, rear-wheel, or all-wheel drive. Follow the vehicle manufacturer’s recommendations for the best results.
3. Check Tread Depth
Ensure your tires have sufficient tread depth, which is crucial for traction. A simple method to check is the penny test: insert a penny into the tread with Lincoln’s head facing down. If you can see the top of his head, it’s time to replace the tire. A tread depth of 2/32 inch or less is considered unsafe.
4. Keep Tires Clean
Cleansing your tires regularly prevents dirt and debris from causing damage. Use mild soap and water to clean the sidewalls and remove any buildup. This not only helps maintain appearance but also allows for better monitoring of tire conditions.
5. Balance and Align Your Tires
Have your tires balanced and aligned periodically, especially if you notice unusual vibrations or uneven wear. Proper alignment ensures your vehicle drives straight and handles correctly, contributing to better tire longevity.
6. Monitor Tire Age
Tires have a lifespan of about six to ten years, regardless of tread wear. Check the DOT code on the tire sidewall to determine its manufacturing date. If your tires are older than recommended, consider replacing them even if they appear to be in good condition.
By following these simple do-it-yourself steps, you can maintain your tire health effectively and extend their lifespan, ensuring safer and more economical driving experiences.
Quick Guide to Inspecting and Replacing Your Car’s Air Filter
Regular maintenance of your car’s air filter is essential for optimal engine performance and efficiency. A clean air filter ensures that the engine gets the right amount of air, which improves fuel efficiency and reduces emissions. Here’s a step-by-step guide for do-it-yourself inspection and replacement of your car’s air filter.
Step 1: Locate the Air Filter
First, consult your owner’s manual to find the exact location of the air filter in your vehicle. Most air filters are found in a rectangular or cylindrical box near the engine. Depending on the make and model, you may need to open the hood to access it.
Step 2: Remove the Air Filter Cover
Use a screwdriver or your hands to remove the clips or screws that hold the air filter cover in place. Carefully lift the cover off to expose the air filter. Be cautious to avoid damaging any components connected to the cover.
Step 3: Inspect the Air Filter
Take out the air filter and inspect it for dirt, debris, and damage. A clean filter is typically white or light-colored, while a dirty filter appears dark and clogged. If you can see dirt or if the filter is visibly damaged, it’s time to replace it.
Step 4: Clean or Replace
If the filter is reusable, gently tap it to dislodge dirt or use compressed air to blow away debris from the inside out. If the filter is too dirty or damaged, purchase a new one. Ensure that you select the correct replacement filter based on your car’s specifications.
Step 5: Install the New or Cleaned Filter
Place the new or cleaned air filter back into its housing, ensuring it fits snugly. Reattach the air filter cover, securing it with screws or clips to ensure it doesn’t come loose while driving.
Step 6: Check Your Work
Double-check that everything is properly secured before closing the hood. It’s advisable to take your car for a short drive to ensure that it runs smoothly and that there are no unusual sounds or warning lights.
By following this quick guide, you can efficiently inspect and replace your car’s air filter, enhancing your vehicle’s performance with minimal effort. Regular maintenance will lead to better fuel economy and prolong the life of your engine.

