


Installing a dash cam is a crucial step for enhancing your road safety and securing evidence in case of incidents. With the increasing need for protection on the road, understanding the installation process can save you time and ensure optimal camera performance. This guide will walk you through the necessary steps for a successful installation, regardless of your technical expertise.
Before you begin the installation process, it’s essential to gather all the necessary tools and equipment. Most dash cams come with a user manual, which provides specific instructions tailored to the model you purchased. Having a clear understanding of the setup will facilitate a smoother installation. Remember, proper positioning of the cam plays a vital role in capturing high-quality footage and minimizing obstructions to your view.
Once you are prepared, you’re ready to start the installation process. This guide will cover everything from selecting the right location for your dash cam to securing the power source. By following these step-by-step instructions, you will ensure that your dash cam is installed correctly, allowing you to focus on the road with peace of mind.
Choosing the Right Location for Your Dash Cam
Selecting the appropriate location for your dash cam installation is crucial for maximizing its effectiveness. The ideal position ensures optimal visibility, captures relevant footage, and avoids obstruction of the driver’s view.
Consider the following factors when choosing the location:
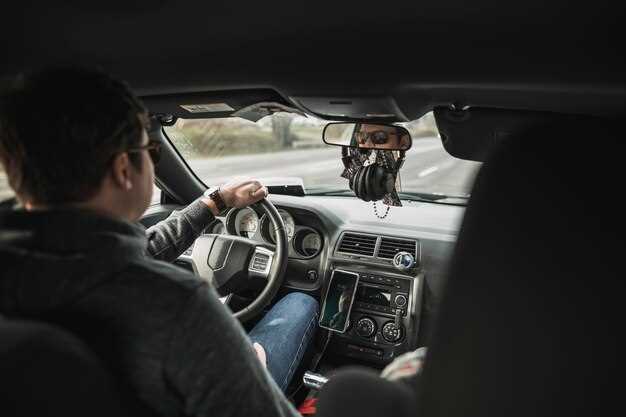
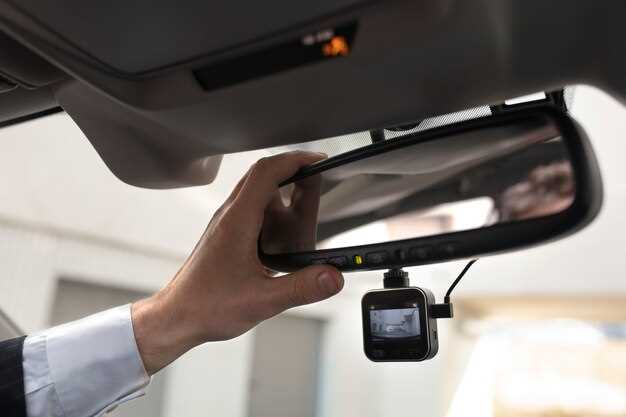
- Windshield Placement: Install the cam behind the rearview mirror to reduce distractions while driving and maintain a clear field of vision.
- Angle of View: Ensure the dash cam is angled correctly to capture the road ahead, as well as side views when necessary. This may require testing different angles before finalizing the installation.
- Power Source: Check the proximity to your vehicle’s power outlet. Position the camera where you can easily connect the power cable without messy wires obstructing your view.
- Stability: Avoid locations with excessive vibrations. Mount the cam on a flat, stable surface to ensure clear video quality without distortion.
- Legal Restrictions: Familiarize yourself with local laws regarding dash cam placement. Ensure the installation complies with regulations to avoid potential fines or issues with law enforcement.
After determining the suitable position, securely mount the dash cam using the provided adhesive or suction cup. Double-check the installation to ensure it remains firmly attached during driving.
By carefully selecting the right location, you can enhance the performance of your dash cam and ensure it captures essential footage in the event of an incident.
Connecting the Dash Cam to Power Sources
To ensure your dash cam operates effectively, proper connection to a power source is essential. There are primarily two methods to power your dash cam: using the vehicle’s 12V power outlet (cigarette lighter) or directly connecting it to the car’s battery.
To begin with, the most common way is to plug the dash cam’s power cord into the vehicle’s 12V outlet. Most dash cams come with a power adapter that fits into this outlet. Start by locating the outlet, which is usually found near the center console or in front of the gear shifter. Insert the adapter into the outlet, ensuring that it fits securely.
Next, route the power cord along the interior of the vehicle for a clean installation. Secure the cable with clips or adhesive pads to prevent it from hanging loosely. Run the cord up the A-pillar and along the windshield to reach your dash cam’s installation point. This setup helps keep the cable hidden and reduces distractions while driving.
If you prefer a more permanent solution, connecting the dash cam directly to the car battery might be ideal. For this method, you will need to use a hardwire kit designed for dash cams. This kit usually includes a fuse tap and appropriate connectors. Begin by disconnecting the negative terminal of the car battery for safety.
Locate the fuse box, which is often found under the dashboard or in the engine compartment. Refer to your vehicle’s manual to identify the correct fuses. Use the fuse tap to connect the power wire from the hardwire kit to a fuse that provides continuous power, while the ground wire connects to a metal point on the vehicle’s chassis.
After the hardwiring is complete, reattach the battery terminal, and test the dash cam to ensure it powers up correctly. Properly connecting your dash cam to a reliable power source will keep it functioning even when the ignition is off, capturing crucial footage during incidents.
Configuring the Settings for Optimal Performance
To maximize the functionality of your dash cam, proper configuration of its settings is essential. Start by accessing the settings menu, usually found through the screen interface. Adjust the video resolution; selecting a higher resolution, such as 1080p or 4K, will enhance the clarity of recordings, ensuring that important details are captured clearly.
Next, set the frame rate. A rate of 30 frames per second is standard for most situations, but if you want smoother motion capture, consider opting for 60 frames per second. This setting is particularly useful in high-speed scenarios, where motion blur can obscure vital evidence.
Enable loop recording if it’s not already activated. This feature allows the dash cam to overwrite the oldest footage when the memory card is full, ensuring continuous recording without manual intervention. Alongside this, consider setting the duration of each video segment; typically, segments of 1 to 3 minutes are ideal for easy review and storage management.
Adjust the G-sensor sensitivity settings to customize the response to sudden impacts. A higher sensitivity level will ensure that critical events, such as collisions, are recorded and saved, while too high a setting may result in unnecessary save actions from minor bumps. Balance is key to prevent excessive storage use.
Lastly, ensure that the audio recording feature aligns with your preferences. Some users may prefer to capture audio for context, while others might want it disabled for privacy reasons. Review all preferences before finalizing the configuration, and make adjustments based on individual driving habits and recording requirements.

